Quickstart
This quickstart assumes you already have Abacus IDE open.
1. Open Or Create A Workspace
Open one project folder that will hold:
data/results/- uploaded or demo configs
- retained run outputs
Abacus IDE treats the open folder as the primary workflow context.
2. Choose How To Prepare Inputs
Use the Inputs panel on the left activity rail.
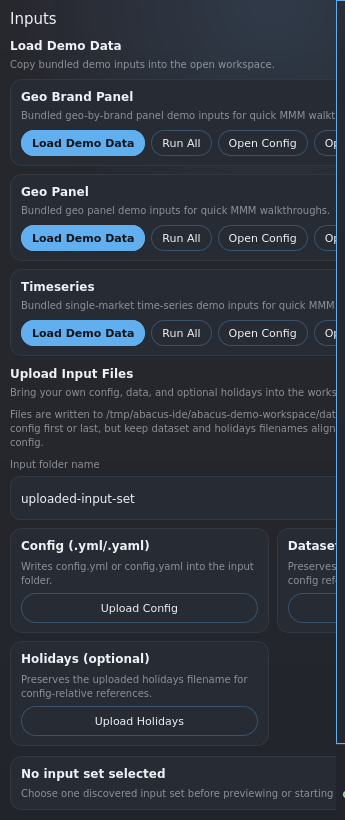
You have two main paths:
- Load Demo Data
- copies a bundled demo input set into the open workspace
- useful for product demos and quick smoke runs
- Upload Input Files
- uploads your own
config.yml, dataset, and optional holidays file into the workspace
- uploads your own
3. Confirm The Active Input Set
The Project stage and Inputs panel should show the selected input set.
Abacus IDE presents one active run input set as:
- config
- data
- holidays, if present
4. Run The Pipeline
Use one of these actions:
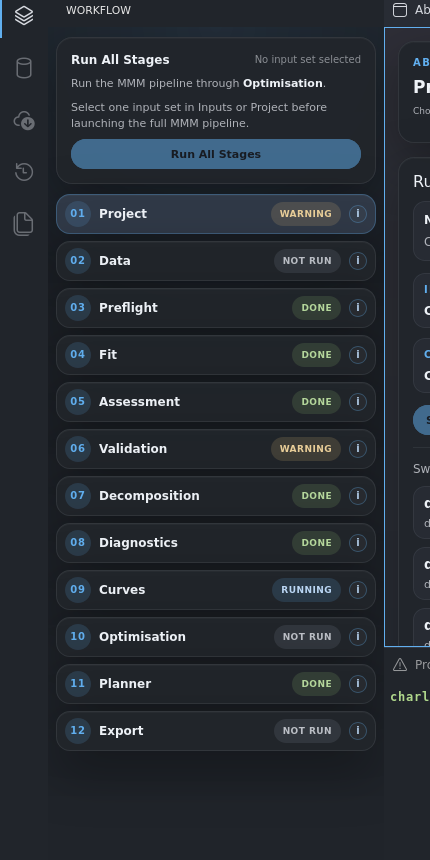
Run All Stages- runs the MMM pipeline through
Optimisation - leaves
Planneras a manual downstream step
- runs the MMM pipeline through
- stage-specific run actions inside the workbench
Terminal output appears in the bottom terminal area as transient run output.
5. Review Retained Evidence
After the run completes, use the workflow spine to move through:
PreflightFitAssessmentValidationDecompositionDiagnosticsCurvesOptimisation
These stages surface retained artifacts from disk rather than recomputing results in the UI.
6. Continue Into Planner
If the retained run is planner-capable, open the Planner stage.
The IDE will surface planner workspaces and open the native planner tabs for scenario exploration and comparison.